Thursday, November 17, 2011

Autumn Maple Clone(s) Tasting

From left to right, '09 Clone, '09 Bruery's Autumn Maple, and '10 Clone
Although I brewed my first attempt at an Autumn Maple clone over 2 years ago and my 2nd attempt about 1 year ago, in all that time never once did I taste either side by side with the real thing.  I also never compared my two versions to one another at the same time.  It’s crazy to think that I allowed that much time to pass without conducting the tasing, but after realizing this, I decided it was time to put them to the test. 

Last week I hosted our monthly homebrew club meeting and it ended up being the perfect opportunity to present the three-way comparison.  Since only a few of the members had previously tasted my versions and not everyone had had the chance to try the Bruery’s Autumn Maple, I thought it would be fun to make it a blind tasting.  Since my first batch was nearly 2 years old, I was afraid to open up a fresh commercial bottle of Autumn Maple in fear that the alcohol and spicing intensities might be different.  Luckily enough, I happened to have a bottle from '09 that I squirreled away in my cellar that was perfect for the occasion.

Appearance:  Even though I poured the glasses and knew which beer was in which glass, it was clear to see which one was not like the others.  The Bruery’s beer showed significantly more carbonation, which resulted in a small layer of foam that lingered around the edge of the glass long after all the others had faded.  The two versions that I brewed were crystal clear with a slightly more orange hue than the commercial beer.  What really surprised me though was that my two clones were practically identical looking even though I used nearly twice the amount of yams in my '10 clone.  I'm not sure whether it was due to them bottle conditioning their beer or not, but the commercial version was slightly cloudy (mine were force carbed and bottled with a counter-pressure filler).

Aroma:  The differences here were very subtle.  I’d say my original clone attempt (’09) smelled nearly identical to the Bruery’s ’09, but my ’10 clone maybe had a bit of a milder spice composition. 

Taste:  I was extremely surprised at how similar the flavors were between my ’09 clone and the Bruery’s ’09 Autumn Maple.  Comparing the two, the spices in the Bruery’s version might have been a little more round with maybe a touch more molasses cookie flavor, but if so, the differences were extremely subtle.  With the '10 clone, the spices seemed even a bit more subdued and more importantly, it had this very nice warm, caramelliness/toffeeness to it.  Maybe it's due to the lower alcohol than in my first clone or maybe it's from the addition of yams in the boil, but regardless, the flavors in this beer seemed to blend together in a smoother manor than all the others and for me it was the most enjoyable to drink.

Mouthfeel:  Although the Bruery’s beer showed more signs of carbonation, I’m not sure if I really felt a difference in my mouth.  One member of our group mentioned that they thought the Bruery’s version had a slightly fuller mouthfeel maybe from less attenuation. 

From left to right, '10 Clone, '09 Bruery Autumn Maple, and '09 Clone
Overall:  Overall I was shocked at how close my two beers came to the original.  When you have them all in front of you and you're trying to determine ways in which they differ, yes, you can find minor variations.  However, between the '09 clone and the '09 commercial version, those differences were so subtle that I would be willing to bet that if I were to hand someone familiar with Autuman Maple my own ’09 clone and tell them that it was the Bruery’s beer, they'd never even suspect that it was anything but the original (aside from the clarity).  The same thing might happen with the ’10 clone, but because it had the nice rounder spice and toffee note, I wouldn't feel as confident. 

Since the above notes are more of a comparison between the beers and not actual descriptions of their components, you can see what some BJCP judges wrote about them by clicking here:  ’09 Autumn Maple Clone and ’10 Autumn Maple Clone

Friday, November 11, 2011

Summertime Gose Tasting

A few months back, I came across a post on Beer Advocate in which the OP was searching for various Goses for a tasting that he was going to be hosting.  Not only was he interested in commercial versions, but he also mentioned that he’d love to include some homebrewed varieties.  Since I’ve really only tried one other example of a Gose, I’ve never been sure how my Summertime Gose compared to the standard and this seemed like a perfect opportunity to find out.  So, in exchange for an honest critique, I sent off a bottle to UrbanCaver and the results came back a week or two later.  You can read the full post here (http://beeradvocate.com/forum/read/4136632#4150881) or just browse his review below.

Review of SonicAlligator's homebrew:

Appearance:  Pours light pale yellow. Lighter then all of the other Goses except the Portsmouth which is similar. Lots of nice white head. Well carbonate. Pretty clear.
Smell:  Smells the best of all the goses sampled. Lots of coriander adds nice lemony characteristics on the nose. A distinct smokiness on the nose. Much more complex than the other Goses but far less smokey than CCB Gose.
Taste:  Tastes lemony and tart. Can definitely taste the lacto (maybe a bit too much) Other than the CCB Gose this is by far smokier than the rest. Coriander spice is strong in this one. Gives lots of lemon zest to the brew. Combined with the lacto tartness and its a bit much in terms of lemony fruitiness. Salt is detectable but doesn't detract from the brew.
Mouthfeel and Drinkability:  Well carbonated mouthfeel. Thick and a bit more "full" of flavour than I would like for this style. Part of the thing I enjoyed about the Portsmouth and Leipziger Goses is that they were light and very refreshing. While this one is a more flavourful complex beer it is not as refreshing as others.

My own notes:  Overall, I’d say I’m fairly happy with the way this one came out.  For my own personal preference, I think the balance of acidity and saltiness is spot on and if I were to brew it again, I might cut back slightly on the coriander.  At the moment it’s present but not overpowering, but I think I’d like it to be a little bit more subtle.  I also agree on the “fullness” as reported by UrbanCaver.  While the beer doesn’t sit heavy by any means, I’d prefer it to be a little lighter feeling so that it would be more refreshing (maybe cut back on the salt?).  Additionally, and this is kind of odd, even after going back and searching for the flavor, I never really was able to pull out the smokiness that they reported.  This probably came from the few cardamom seeds that I threw in, but the flavor comes across to me as a maybe a bit more minty than smoky.  

Wednesday, November 2, 2011

The 2nd Barrel: Pediococcus and Brettanomyces Lambicus

Back in May, I made the long drive over to Prosser, WA to pick up a freshly emptied white wine barrel from Maison Bleu Winery.  When I arrived though, the barrels were in such great shape and at such an affordable price that, considering the effort I went to in order to locate such a barrel, it only made sense that I come home with two.  At the time I didn’t have a plan for the second barrel (B2), but knowing that I had a number of homebrewing buddies eager to delve deeper into the world of sour beers, coming up with a plan would be a piece of cake…or so I thought.

For the first barrel project, Amalgamation Autonomous, each brewer worked within a group-defined set of guidelines to come up with their own recipe that, when combined with the other batches, would hopefully create a unique beer that would possess all the complexities that we intended to achieve.  Everyone’s beer was slightly different than the others, but on fill day, one of the batches stood out a bit for already being quite sour with an underlying lemony Brett funkiness.  Because this batch showed promise, was unique in that it was pre-soured with only Pediococcus and then fermented with only Brettanomyces Lambicus, it seemed like a solid candidate to base our B2 beer off of.

144 lbs of Grain
With a world of options to consider, we all seemed to like the idea of the Pedio/Brett beer for its simplicity, repeatability, and uniqueness.  Even though everyone agreed to the concept of Amalgamation Autonomous when we were designing it, down the road there was some concern about it being too much of a hodgepodge “throw everything into a bucket and hope for the best” type of beer.  With B2, we wanted to eliminate that worry by designing the beer from the finished product backwards using only one grain bill.  In doing so, we still wanted to incorporate a significant portion of unmalted wheat so that there would be plenty of long chain dextrins for the bugs to work on over time, but we also wanted the brew day(s) to be relatively simple by only using a single infusion mash.  In addition to the wheat, we wanted to differ the base beer from B1 by starting with a higher gravity and a bit darker color...which we partially accomplished by the addition of CaraMunich 40 and Special B.

Darker color than B1
As for the souring organisms, we liked the idea of only using Pedio and Brett.  According to most material I’ve read on brewing lambics and other wild ales, Pediococcus seems to be the bacterium that’s responsible for the majority of the lactic acid production and yet when you talk to other homebrewers/brewers, it’s rarely mentioned as an element that people focus on.  So, in order to highlight this critical critter of acid ales, we thought it would be fun to use it as the sole souring element in our beer.  Pedio does produce a ton of diacetyl though and without any other wild element in the beer, it would be rather one-dimensional.  To rid the beer of the diacetyl and provide the funky complex background, we decided to ferment the beer out with both Wyeast and White Labs’ strains of Brettanomyces Lambicus.

Ideally we would have liked to have pre-soured as much of the wort as possible with pedio before pitching in the Brett, but due to some logistical constraints, we had to come up with an alternative method.  After much debate and planning, we came up with a schedule that hopefully will still yield the same results yet is a little less risky.   Below is a condensed version of our brewing plans, but if you would like to see the full thing, you can view the entire document by clicking here.

20 gallons of Brett Lambicus beer waiting for the barrel
·         Brew 10 gallons of wort, chill to 90 degrees and transfer into C02 flushed corny kegs.  Inoculate with 1 liter of pedio and hold at 85 degrees until the first barrel fill day.

·         Brew 20 gallons of wort and split into two, 10 gallon batches.  Pitch Wyeast Brett Lambicus into one and White Labs Brett Lambicus into the other.  Ferment at about 80 degrees.

·         Barrel fill day.  Brew 30 gallons of wort and transfer directly into the barrel.  To this, add the 20 gallons of Brett fermented beer while reserving a little bit of the Brett yeast cake.  Transfer the pedio beer onto the leftover Brett yeast in the now empty carboys.

·         After primary fermentation has resided both inside the barrel and inside the carboys, rack the pedio/Brett fermented beers into the barrel and seal.

1 liter commercial pack of Pedio
One of the reasons for pre-souring the beer with pedio was not only just to lower the initial pH, but also to increase the overall amount of pedio in the beer.  It’s an anaerobic organism that typically doesn’t compete well with other microorganisms and really doesn’t get to work in a lambic until after the all of the oxygen has been consumed in the beer and the other organisms have completed the majority of their cycles (4-12 months).  Because of this, we wanted to give it as much of a head start as possible by introducing it as the sole organism in an oxygen free wort with the best possible nutrients for reproduction.  From talking with a few microbiologists, it sounds like bacteriological peptone is the perfect nutrient for propagating bacteria, but since none of them were able to provide me with any and the online suppliers only sell to labs/companies, we had to go with option number 2.  Apparently bacteria also love freshly dead yeast (provided their nutrients are accessible), so at the time of inoculating the wort with the Pediococcus, we also added about a half cup thick yeast slurry that was pressure cooked to burst the cell walls.  It certainly didn’t smell great and I’m slightly worried about how it’ll affect the end beer, but since Brett is great at cleaning up autolyzed yeast over time, hopefully it will go to town on the pressure cooked yeast as well.

Barrel #2

Recipe Specifics

Batch Size (Gal): 70
Total Grain (Lbs): 144
Anticipated OG: 1.055
Anticipated SRM: 10.0
Anticipated IBU: Less than 10
Wort Boil Time (mins): 60
Anticipated ABV: 7.25%

Grain

48.6% - 70 lbs Pale Malt
24.3% - 35 lbs Flaked Wheat
16.7% - 24 lbs Vienna Malt
8.3% - 12 lbs CaraMunich
2.1% - 3 lbs Special B

Hops

Varied.  Any variety added between 60 and 30 minutes contributing 10 IBUs or less.

­Yeast

White Labs 653 Brettanomyces Lambicus 
Wyeast 5526 Brettanomyces Lambicus
Wyeast 5733 Pediococcus

Mash Schedule

60 minutes @ 154°
15 minutes @ 168°
Sparge with 170° water

Notes

9/17/2011 – Nick brewed 10 gallons of wort, cooled to 75° and inoculated both carboys with Wyeast Brett Lambicus.  The yeast had been going on a stir plate for the past week and a half with 1 liter of 1.035 wort.

10/1/2011 – I brewed 10 gallons of wort and once it was cooled to 85°, I racked it into two C02 flushed corny kegs.  I then added the 1 liter commercial pack of Pediococcus that a local brewery ordered for us from Wyeast.  This all then went into my fermentation chamber where it was held @ 85° until the first barrel fill day.

10/2/2011 - Bob brewed up 10 gallons of wort, cooled to 75° and then inoculated both carboys with White Labs’ Brettanomyces Lambicus. 

10/9/2011 – Paul, Ben, and Brendan all brewed up 30 gallons of the wort, chilled to 70° and then racked directly into the barrel.  The yeast was roused in each of the four Brettanomyces carboys and all but about a cup from each was racked into the barrel. 

To make room for fermentation, about a third of each pedio corny keg was transferred into a third corny keg so that all three of them were filled to about 2/3rds the way full.  The 4 or so cups of Brettanomyces yeast slurry was then divided equally between the three kegs and they were allowed to ferment at 75°.

10/26/2011 – Activity from primary fermentation had slowed dramatically in both the barrel and the kegs, so we stirred up the kegs and transferred the remaining 10 gallons into the barrel.  We ended up with only about a quart of extra beer that didn’t fit in the barrel!

Tuesday, November 1, 2011

Hair of the Dog Matt Clone

With NHC approaching, my brewing focus lately has been centered on creating beers to serve at either Club Night or in the Hospitality Suite.  I’ll still probably enter a few into the competition for fun, but I get so much more enjoyment out of creating something that’s unique and complex rather than crafting the best possible example of a certain style.  Since I’ll be serving my beer to the public, I obviously want to lead with my best foot forward and what better way to do that than to attempt to recreate a beer that, to me, is very possibly the best I’ve ever had…Hair of the Dog’s commemorative beer Matt.

Matt is a beer that was originally created to honor the 10th anniversary of one of Seattle’s best bottle shops…Bottleworks.  This sinfully delicious concoction is absolutely unique in that it’s an intensely malty, relatively sweet beer with flavors of caramel, chocolate and dark fruits balanced with a hint of smoke from both peat and rauch malt.  The beer was then aged in 30 yr bourbon barrels and Eau de Vie de Pomme casks from Clear Creek Distillery in Portland before being blended for the final product.    

Alan Sprints, the owner/brewer of Hair of the Dog Brewery, has been very generous in giving out details about his more commonly produced beers such as Fred, Adam, and Doggie Claws, but locating information relating to Matt was a bit more of a challenge.  According to numerous unconfirmed web sources, Matt was based off of the grain bill for Adam and this served as a starting point for me (Alan produced an Adam recipe for Sean Paxton which you can view here).  According to Alan though, Matt is produced using two Munich Malts, 2 smoked malts, and 2 Belgian sugars and so Matt clearly isn’t just a scaled up, barrel aged version of Adam.

Knowing that Alan likes to use Gambrinus malts, I decided that I too would use their Pale malt as a base with significant portions of their 10 and 30 lovibond Munichs.  Two Munichs, check.  Unsure of which Belgian sugars are used, I opened up a bottle of Matt and tried to pick out the various flavors myself.  With so much going on in the beer, it was difficult to pinpoint the specific flavors exactly, but there were definitely a lot of caramel/toffee notes along with some underlying raisin-y/fig type flavors.  In the end I decided to go with a 50/50 mix of D1 and D2 Belgian Candi Syrup (D1 for the more caramel/molasses flavors and D2 for the more rich fruit flavors).  Two Belgian sugars, check.

Determining which smoked malts to use and the corresponding amounts caused me a bit of debate.  Adam definitely uses peated malt, along with rauch malt, but my sensitivity to it is pretty strong and the last thing that I wanted was for my Matt beer to come out tasting like band aides from all the peat phenols.  Alan mentions in the July 31st podcast of the Sunday Session that he does use peated malt, but that the phenol levels are quite different between the different maltsters (primarily Simpsons and Hugh Baird) and you have to be careful with what you choose.  After researching the two, I was excited to learn that the Hugh Baird variety only had a phenol level in the 4-6ppm range whereas Simpsons was up near 12-24ppm…but this excitement quickly vanished after an exhaustive search to locate some HB failed to provide any results.  In the end, and after doing a side by side taste of Matt and Adam, I decided that I would still use the Simpson’s malt, but just cut down the overall level.  If 3.2% of the grist from Adam is the Hugh Baird variety of peated malt, which has an average phenol level of 5ppm, I treated this as 16 units of peated phenols (3.2 x 5ppm = 16).  So, with only access to Simpsons malt, I knew that I wanted the overall peated phenol level to come in at about ½ to 2/3 the amount of that in Adam and so I ended up making only 0.55% of my grist Simpsons peated malt (0.55 x the average phenol level of Simpsons malt…18 = 10 phenol units).

As for the remainder of the grist, I tried to stick with either ingredients that Alan would use or malts from the various maltsters that he likes (i.e. Crisp crystal malts).  There’s an important distinction though between trying to replicate a recipe and replicate a result.  In the case of Matt, I wanted the result and so even though I’m sure Alan didn’t use all of the same ingredients or proportions that I did, my choices were based on the experience that I’ve had with these ingredients of the flavor contributions that I thought that they would impart. 

With the grist settled, it was time for brew day.  One of the ways in which Alan generates such rich, full bodied beers is through the use of a high temperature mash.  It seems counterintuitive to create such a high gravity beer starting with a 157° mash, but with a large pitch and a generous dose of oxygen, hopefully the Scottish Ale strain will be up for the challenge.  During the mash, I decided that I would leave the roasted grains out until mash-out so as not to have to adjust my water too much.  When I added them though, after 10 minutes the color was nowhere near the nearly opaque blackness of the original beer.  I was hesitant to add more grains since I didn’t want the end product to have any sort of roasted harshness, but after tasting the wort, there was definitely room for a second addition.

With a long, four-hour, melanoidin-producing boil, my Matt brew day turned out to be one of my longest on record.  Even though Alan pitches at 75° and ferments at 68°, the Scottish Ale strain is relatively clean and rather than risking any additional alcohol heat, I ended up pitching at 62° and fermenting at 60°.  
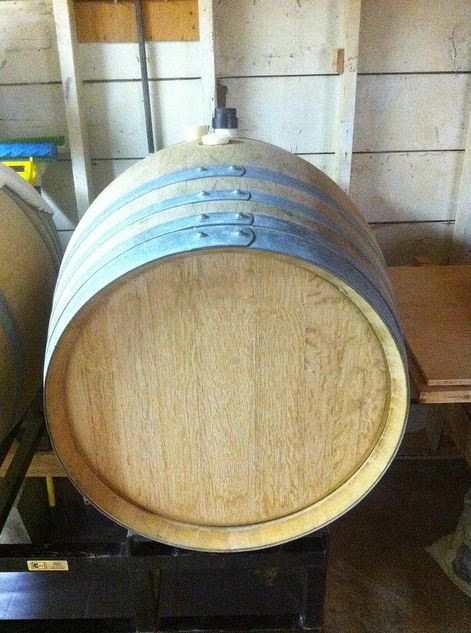
As the fermentation slows, I’ll gradually increase the temperature up to 68° to finish and then rack half onto a half ounce of oak with Clear Creek’s 8 yr Eau de Vie de Pomme and half onto a half ounce of oak with Maker’s Mark.  After six months of aging, hopefully the beer will show some slight resemblance of the original Matt.

Hair of the Dog Matt

Recipe Specifics

Batch Size (Gal): 6.3
Total Grain (Lbs):  23.54
Anticipated OG:  1.108
Anticipated SRM:  37.8
Anticipated IBU:  74
Wort Boil Time (mins):  240
Anticipated ABV:  11.1%

Grain/Fermentables

56.6% - 14.0 lbs Gambrinus Pale Malt
15.2% - 3.75 lbs Gambrinus 10L Munich
11.1% - 2.75 lbs Gambrinus 30L Munich
4.0% - 1.00 lbs Crisp 77L Crystal Malt
3.2% - 0.8 lbs D2 Candi Syrup
3.2% - 0.8 lbs D1 Candi Syrup
3.0% - 0.75 lbs Crisp 45L Crystal Malt
1.5% - 6 oz. Crisp Chocolate Malt (See Notes Below)
1.0% - 4 oz. Weyerman Smoked Malt
0.5% - 2 oz. Crisp Black Malt (See Notes Below)
0.5% - 2 oz. Simpsons Peated Malt

Hops

28 grams Northern Brewer (9.4% AA, Pellets) @ 95 mins
28 grams Northern Brewer (9.4% AA, Pellets) @ 50 mins
35 grams Styrian Goldings (5.2% AA, Pellets) @ 45 mins

Yeast

Wyeast 1728 Scottish Ale

Water Profile and Additions

Charcoal filtered Seattle water
Mash Additions:  0.5g/g Gypsom, 0.5g/g Baking Soda
Sparge Additions: Adjusted pH down to 5.6 using phosphoric acid
Boil Additions: 4.5 grams Calcium Chloride, 2.1 grams Epsom Salt, 1.2 grams NaCl

Mash Schedule

60 minutes @ 157°
20 minutes @ 168°
Sparge with 170° water

Notes

Brewed solo on 10/22/11

10/16/11 – Made yeast starter with 2 liters 1.035 starter wort and 2 smack packs.  Placed on stirplate for 36 hours and then crashed in the fridge.  After 12 hours, decanted spent wort.  On brew day, I added another liter of fridge-temp wort to the yeast and placed flask on stirplate @ 60°.

10/22/11 – Doughed into 8.5 gallons at 165° and came to a rest at 156°.  Temp at 157° after 3 minutes.  Added mash minerals and took a pH reading which came out to be 5.31.  Also added phosphoric acid to sparge tank until pH reached 5.6.

After 60 minutes, I adjusted the temp regulator to bring the mash up to 168° and at the same time, I added in the chocolate and black patent malts.  Color was nowhere near dark enough, so I tasted the wort and added in another 3 oz. chocolate and 3 oz. black patent. 

At sparge, first runnings were 1.075.  Collected 8 gallons with a total of 594 gravity units.  Final runnings ended at 1.064.

Started boil and after 20 minutes, pH was at 5.13.  After 60 minutes of boiling time, sugar and mineral additions were added.  Boiled down to 5 gallons adding hops at the appropriate times.  With about 45 minutes left to go, I topped off to about 6.75 gallons.  Yeast nutrient, whirlflock, and immersion chiller were all added in the last 15 minutes.

Chilled down to 65°, rested for one hour, and then racked into carboy.  Carboy was placed in the fermentation chamber @ 60° and after 2 hours, temp had dropped to 62°.  At this point, I aerated with pure 02 for 60 seconds and then pitched entire yeast starter.

10/25/11 – Raised temp to 62°
10/27/11 – Raised temp to 65°
10/29/11 – Raised temp to 68°

11/5/11 (expected) – Assuming that the beer has completed fermentation by this date, I plan on splitting the beer into two kegs.  Into keg one will go a half ounce of oak (11 American Heavy Toast cubes, 3 French Med+ cubes, and 2 charred American Heavy Toast cubes) and the 4 oz of Makers Mark that they’ve been soaking in.   In the other keg, I’ll add the same variety of oak and the 4 oz. of Clear Creek Distillery’s 8 yr Eau de Vie de Pomme that they’ve been soaking in for the last three weeks.  This will all go down into my basement (~60°) and rest for six months.  I’ll taste along the way and add more oak/spirits if needed.


Tuesday, September 20, 2011

Brettanomyces Experiment Results

Back in April, using Chad Yakobson’s Brettanomyces Project dissertation as a backdrop, I began an experiment to determine which concentration of starting lactic acid would yield a brett beer with the most desirable ester profile.  Yakobson’s empirical data showed that, basically, as the initial level of lactic acid increased, the level of attenuation increased while the secondary metabolites decreased.  While this information is extremely fascinating to me, it didn’t tell me where that perfect middle ground would be, or if there even would be one from a completely subjective taste perspective.  To find out, I replicatedthe study using a smaller sample size and this last week, I finally was able to look at the results.

After fermenting and aging for about four months, I decided to open up each brettanomyces lambicus sample and take the fermentative measurements.   Oddly enough, all six of the White Labs samples finished out right around 1.0043 specific gravity while all of the Wyeast samples finished out at 0.  Granted that each of my samples fermented for about 3.5x the length of those in Yakobson’s study, I still was a little surprised that the initial concentration of lactic acid didn’t play a bigger role in the final gravity of each beer.  In his Wyeast sample, there was nearly double the percentage of apparent attenuation between the 0mg/L sample and the 3000mg/L sample and yet in my results, they ended up nearly identical.  

Although the disparities between the two are not strikingly large, the Wyeast beers did end up with slightly lower pH than the matching White Labs beers.  I’m not sure if this is telling that the Wyeast strain produces slightly more acid than the White labs version or if it has to do with the slightly different levels of attenuation.  If the White Labs beers were able to ferment all the way down to 0, would the pH be more similar?  

As fun as the empirical data is to look at, my main reason for this experiment was because I wanted a subjective view of the flavor.  So, on September 15th, six of my homebrew club friends, each with sophisticated palates, gathered for a blind tasting.   Although I knew that a few of the participants had read Yakobson’s dissertation, I wanted to keep the details of my experiment a surprise and so prior to the tasting, only one other person in the group was aware of what we would be sampling.   I also wanted to be able to participate blind and so at the time of bottling, I randomly selected samples from the batch and transferred them into consecutively numbered bottles (I did keep index notes though).  Four weeks later at the tasting, when I poured each bottle into the individual sample glasses, I had long since forgotten which bottle was which beer.    

Each participant was given one sample from each of the 12 variants at the same time along with a score sheet to record their perceptions and preferences.  Since Yacobson’s study showed dramatic changes in four ester concentrations based upon the initial levels of lactic acid, I included these four flavor profiles (Ethyl Acetate – Solventy, Ethyl Lactate – Buttery/Creamy, Ethyl Caproate – Fruity/Wine, and Ethyl Caprylate – Fruity/Apple) as well as two other characteristics (Goaty/Funky and overall sourness).  In addition to these flavors, I also asked the participants to rate each sample based on what they determined to be the overall “Brettiness” of each sample as well as their overall satisfaction with each one.  All ratings were based on a 5 scale with 5 being the highest.

For each of the samples below, I compiled the scores, threw out the high and low, and then averaged the scores for each concentration level.  The results are as follows: 


Mean ethyl lactate scores for Wyeast seemed to increase as the initial concentration of lactic acid increased, but after 1000mg/L, the perception of the ester dropped off.  A similar occurrence happened with the White Labs strain except there was a near equal level of detection between the 1000 and 3000mg/L concentrations.  This is interesting to me because in Yakobson’s study, there was a clear correlation between the acid and ester and the concentration of the ester seemed to increase at an exponential rate as the acid increased.  In my results, we didn’t really see that and in fact, the overall highest perception occurred at 1000mg/L.

 
The mean ethyl acetate scores for my results differ considerably from what Yakobson found in his study.  Similar to ethyl Lactate, from an initial concentration of 100mg/L of lactic acid, there was a slight correlation between the ester and the acid concentration.  We see a somewhat similar patter with the White Labs strain starting at about the 500mg/L concentration, but with Wyeast, at the same mark the two are basically inversely correlated.    

 
Interestingly enough, my results for Ethyl Caproate are almost entirely opposite of what Yakobson found.  In general, this is one of the esters that he basically found to decrease in concentration as the amount of initial lactic acid increased.  My results show that our perception of the ester generally increased along with the lactic acid concentration.  It’s interesting to note that again Wyeast peaked in flavor around the 1000mg/L mark whereas with the White Labs strain, starting at the 100mg/L mark, there’s a pretty consistent increase in ester detection as the lactic acid increases. 

 
A somewhat similar ester to Ethyl Caproate, our Ethyl Caprylate detection varied by strain.  It appears as though we had a growing detection of it up until the 500mg/L point with the Wyeast strain, after which the level fell closer to the mark at 0mg/L of lactic acid.  With the White Labs strain though, our perception of it was all over the map and it does not appear that there was any correlation to the lactic acid concentration levels.  Both of these results were contrary to what Yakobson found though.  

 
In addition to looking at the specific, individual esters, I asked my participants to taste each sample and rate them based on their contentment of the overall “brett” flavor.  This is difficult concept to quantify since each participants’ perception of what brett really tastes like can differ and their individual preference for certain esters associated with brett vary, but overall, I wanted to see if there were any noticeable trends.  It turns out that with the White Labs strain, there definitely appears to be an increase in perceived “brettiness” up until the 1000mg/L mark after which the perception essentially levels off.  Although there was a big drop between 0 and 100mg/L acid concentration, starting at the 100mg/L mark we see a similar pattern with the Wyeast strain.  It appears that perceived “brettiness” increases with the lactic acid concentration up to about the 2000mg/L mark.  

So how does all of this add up?  Assuming that these results were repeatable every single time, I suppose if you wanted to tailor a beer to have a certain flavor profile, you could look above for the ester that you want to profile and then choose the initial concentration of lactic acid which resulted in the highest perception of said ester.  If you want a mixture of the esters resulting in the best flavor profile, what’s the best method?  With the data that I gathered, I went about this in two different ways.

 
In the first method, for each level of initial concentration, I took the six flavor profile scores and created one overall mean score.   As you can see in the Wyeast results above, it appears as though people thought that the greatest concentration of flavors was to be had at the 500-1000mg/L initial acid concentration level.  With the White Labs strain, the results were a little more mixed.  In general, flavor concentrations were greatest at, or above, 1000mg/L with the highest overall flavor rating at the 3000mg/L mark.  

In addition to aggregating the individual flavor ratings, I also asked each participant to rank their top three favorite samples based on overall flavor and general satisfaction.  To compute a final score and rank, for each 1st place vote, I awarded 3 points, 2nd place I awarded 2 points, and 1 point for each 3rd place vote. 
 
Although the Wyeast 3000mg/L sample came in first in terms of total number of votes, based on the scores, the top preference was actually the White Labs 2000mg/L sample.  Even though these results don’t match perfectly with the aggregated scores above, the White Labs result is fairly close since the 2000mg/L sample tied for 2nd in terms of highest score with the aggregates above.  To me though, it’s maybe more interesting that the 3000mg/L Wyeast sample received the most votes when that sample above had five other samples with higher aggregate scores.  My assumption is that this has to do with my participants’ general preference for increased acidity.  Whereas the ratings above were based on ester/flavor concentrations, the votes and scores were based on which sample they liked the best.   Since the 3000mg/L sample had a fair amount of aggregated flavor and a higher level of acidity, it makes logical sense that they might rate it higher than say a sample with a slightly higher level of combined flavors but with much lower acidity.  Unfortunately this theory doesn’t hold up so well when you look at the 3rd and 4th place samples…

Overall, the experiment was a lot of fun to conduct even though the results didn’t mirror those that Yakobson found.  I was expecting to see stronger correlations between the esters and the initial levels of lactic acid, and although we didn’t, I think the results that I found proved that perceptions don’t always match up with reality.  

Even though I attempted to recreate Yakobson’s project as best I could, I’m still fully aware that my experiment was not without flaws and the two don’t match up perfectly.  If I were to replicate it again, I definitely would like to take fermentative readings at the 35 day mark to see if the attenuation rates ended up closer to what Yakobson found.  As for the tasting, profiling six different esters between twelve different beers is a big challenge and I think I would restructure the tasting a bit to help with this task.  First, I might break the tasting down into two sessions of six samples.  While it was fun to try the White Labs and Wyeast samples side by side to see how they differ, I believe that if we were to only judge the six samples from one strain at a time, we wouldn’t run into palate fatigue as quickly and our scores might have been spread apart a bit more than they were.  Related to this, I think that using a 5-point rating scale clustered the results too much and for future ratings, a 10-point scale would allow for a little more variation.  Lastly, I failed to provide everyone with a benchmark sample first.  Without this beer to calibrate our palates, the first sample that each of us tried probably averaged three points across the board since we didn’t have anything to compare the concentrations of flavors against (it’s impossible to know though since I asked everyone to start at different samples and move about the group randomly).
Related Posts Plugin for WordPress, Blogger...